
Ender 3 Klipper Conversion – Stage 7 – Filament Runout Sensor
Basic filament sensor made from a micro switch.
- Ender 3 Klipper Conversion – Stage 1 – Klipper & Mainsail
Ender 3 Klipper Conversion – Stage 2 – Configure Bed Level Probe
Ender 3 Klipper Conversion – Stage 3 – Extruder Rate & Stepper Motor Calibration
Ender 3 Klipper Conversion – Stage 4 – PID calibration
Ender 3 Klipper Conversion – Stage 5 – Camera Setup & Remote Access
Ender 3 Klipper Conversion – Stage 6 – Macros
Ender 3 Klipper Conversion – Stage 7 – Filament Runout Sensor
Ender 3 Klipper Conversion – Troubleshooting
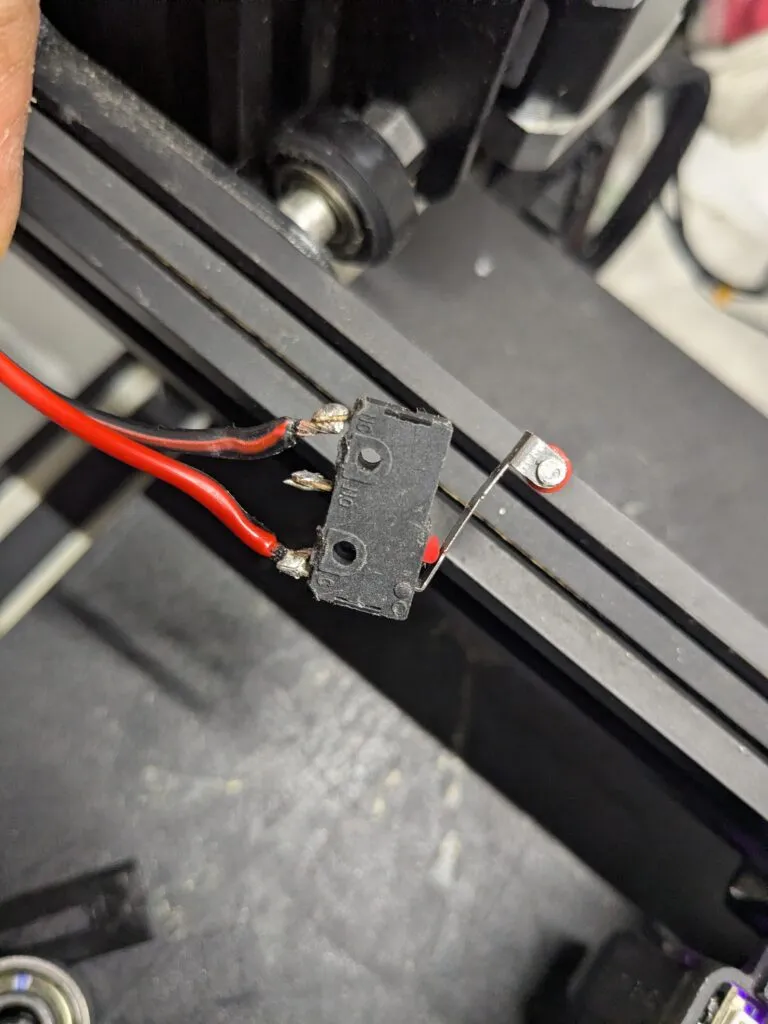
Get a micro switch and solder wires to its two ends. In a more technical expression:
Common terminal – Normally Closed terminal.
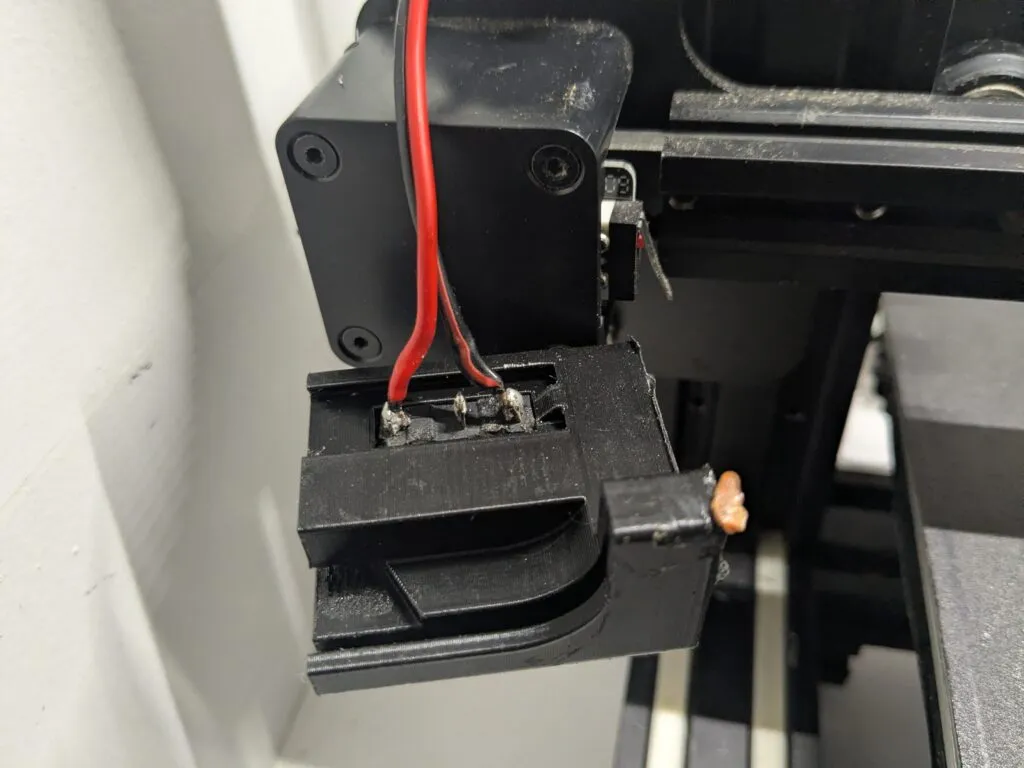
Print a housing for the micro switch:
https://www.thingiverse.com/thing:4583068
https://www.thingiverse.com/thing:4145012
https://www.thingiverse.com/thing:3379934
Install the micro switch:
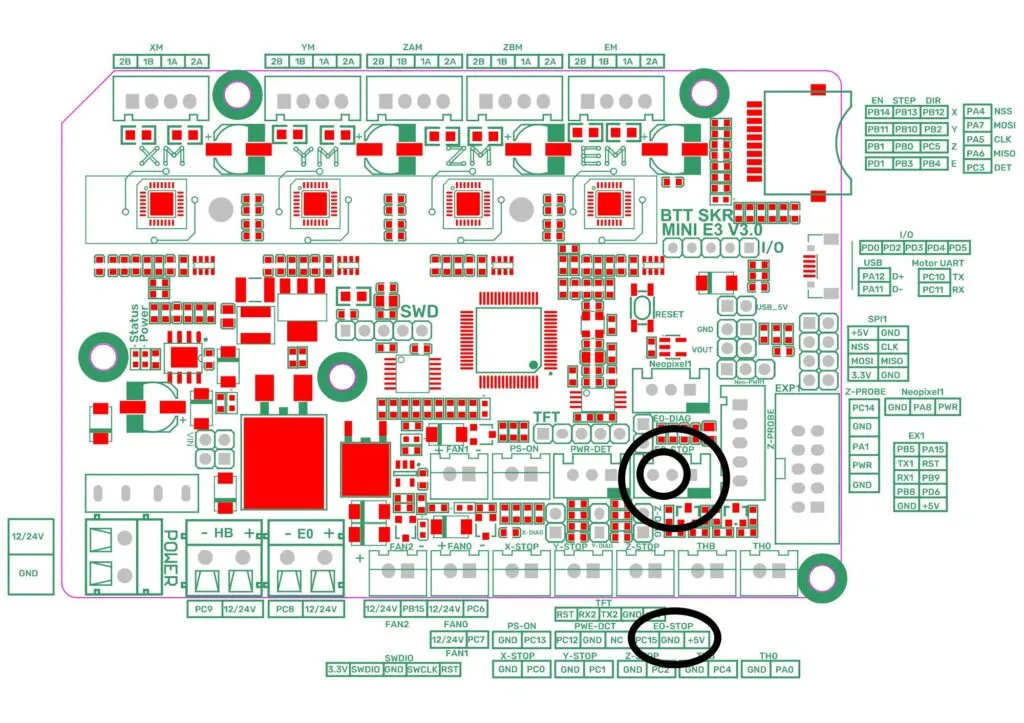
Connect the switch wires to the BTT SKR mini E3 v3.0
Find the E0-STOP connector then locate the PC15 pin and GND next to it.
Add runout sensor lines to printer.cfg file
[filament_switch_sensor filament_sensor]
pause_on_runout: True
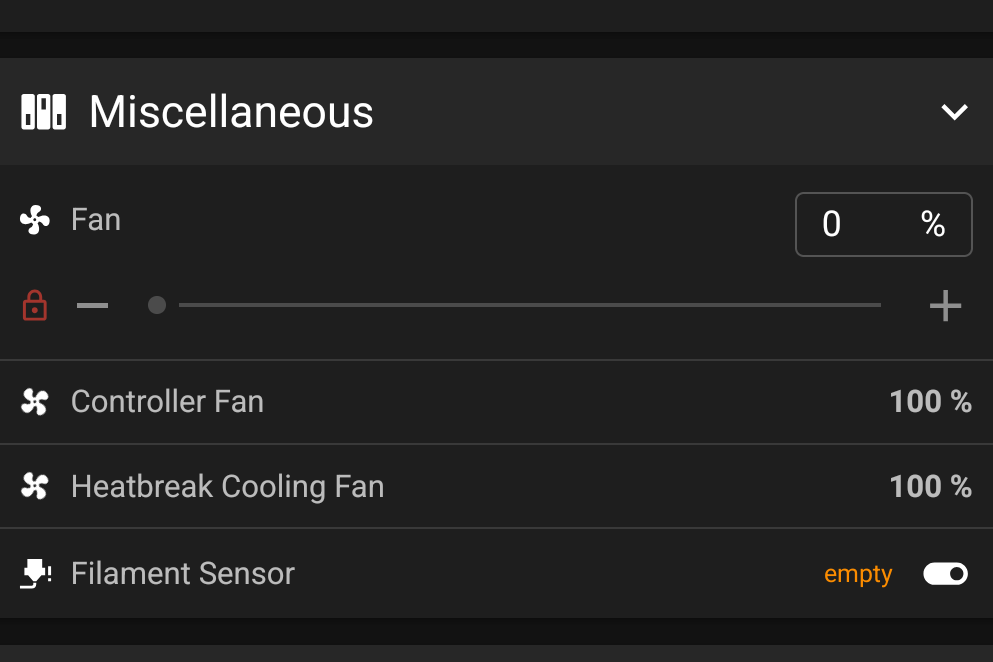
switch_pin: PC15If everything was done correctly then a Filament Sensor line is now visible under the Miscellaneous section within the Dashboard.
It shows empty when no filament is running through:
It shows detected when filament is going through:
